> For the complete documentation index, see [llms.txt](https://helpdesk.ldtsoft.work/ldt-online-course/llms.txt). Markdown versions of documentation pages are available by appending `.md` to page URLs; this page is available as [Markdown](https://helpdesk.ldtsoft.work/ldt-online-course/enroll-and-price/how-to-sell-your-course-as-subscription-membership.md).
# How to sell your course as subscription/membership
Sell a course as a recurring subscription with a subscription app
### 1. Method 1: Limit time access
#### 1. Install subscription App
Our App is compatible with all subscription Apps
On this guide we use [Shopify Subscription App](https://apps.shopify.com/shopify-subscriptions)
Subscription app listing
#### 2. Setup your subscription purchase option
#### - Create subscription plan from Shopify Subscription App
Create subscription plan
#### - Now you can see subscription purchase option from your product page
Subscription on product page
#### 3. Link your subscription product to your course
Subscription course
* The customer will enroll your course after they buy your product
* Initially, customer access will be limited for 31 days
* The course will be renewed for the next 31 days after the customer pays for the next monthly cycle
### 2. Method 2: Enrollment tags
#### 1. Install subscription App
On this guide we use [Seal Subscription App](https://apps.shopify.com/seal-subscriptions)
#### 2. Setup Active Tag in Seal Subscription App
The goal is to set up the subscription application to add a customer tag when a customer activates a subscription.
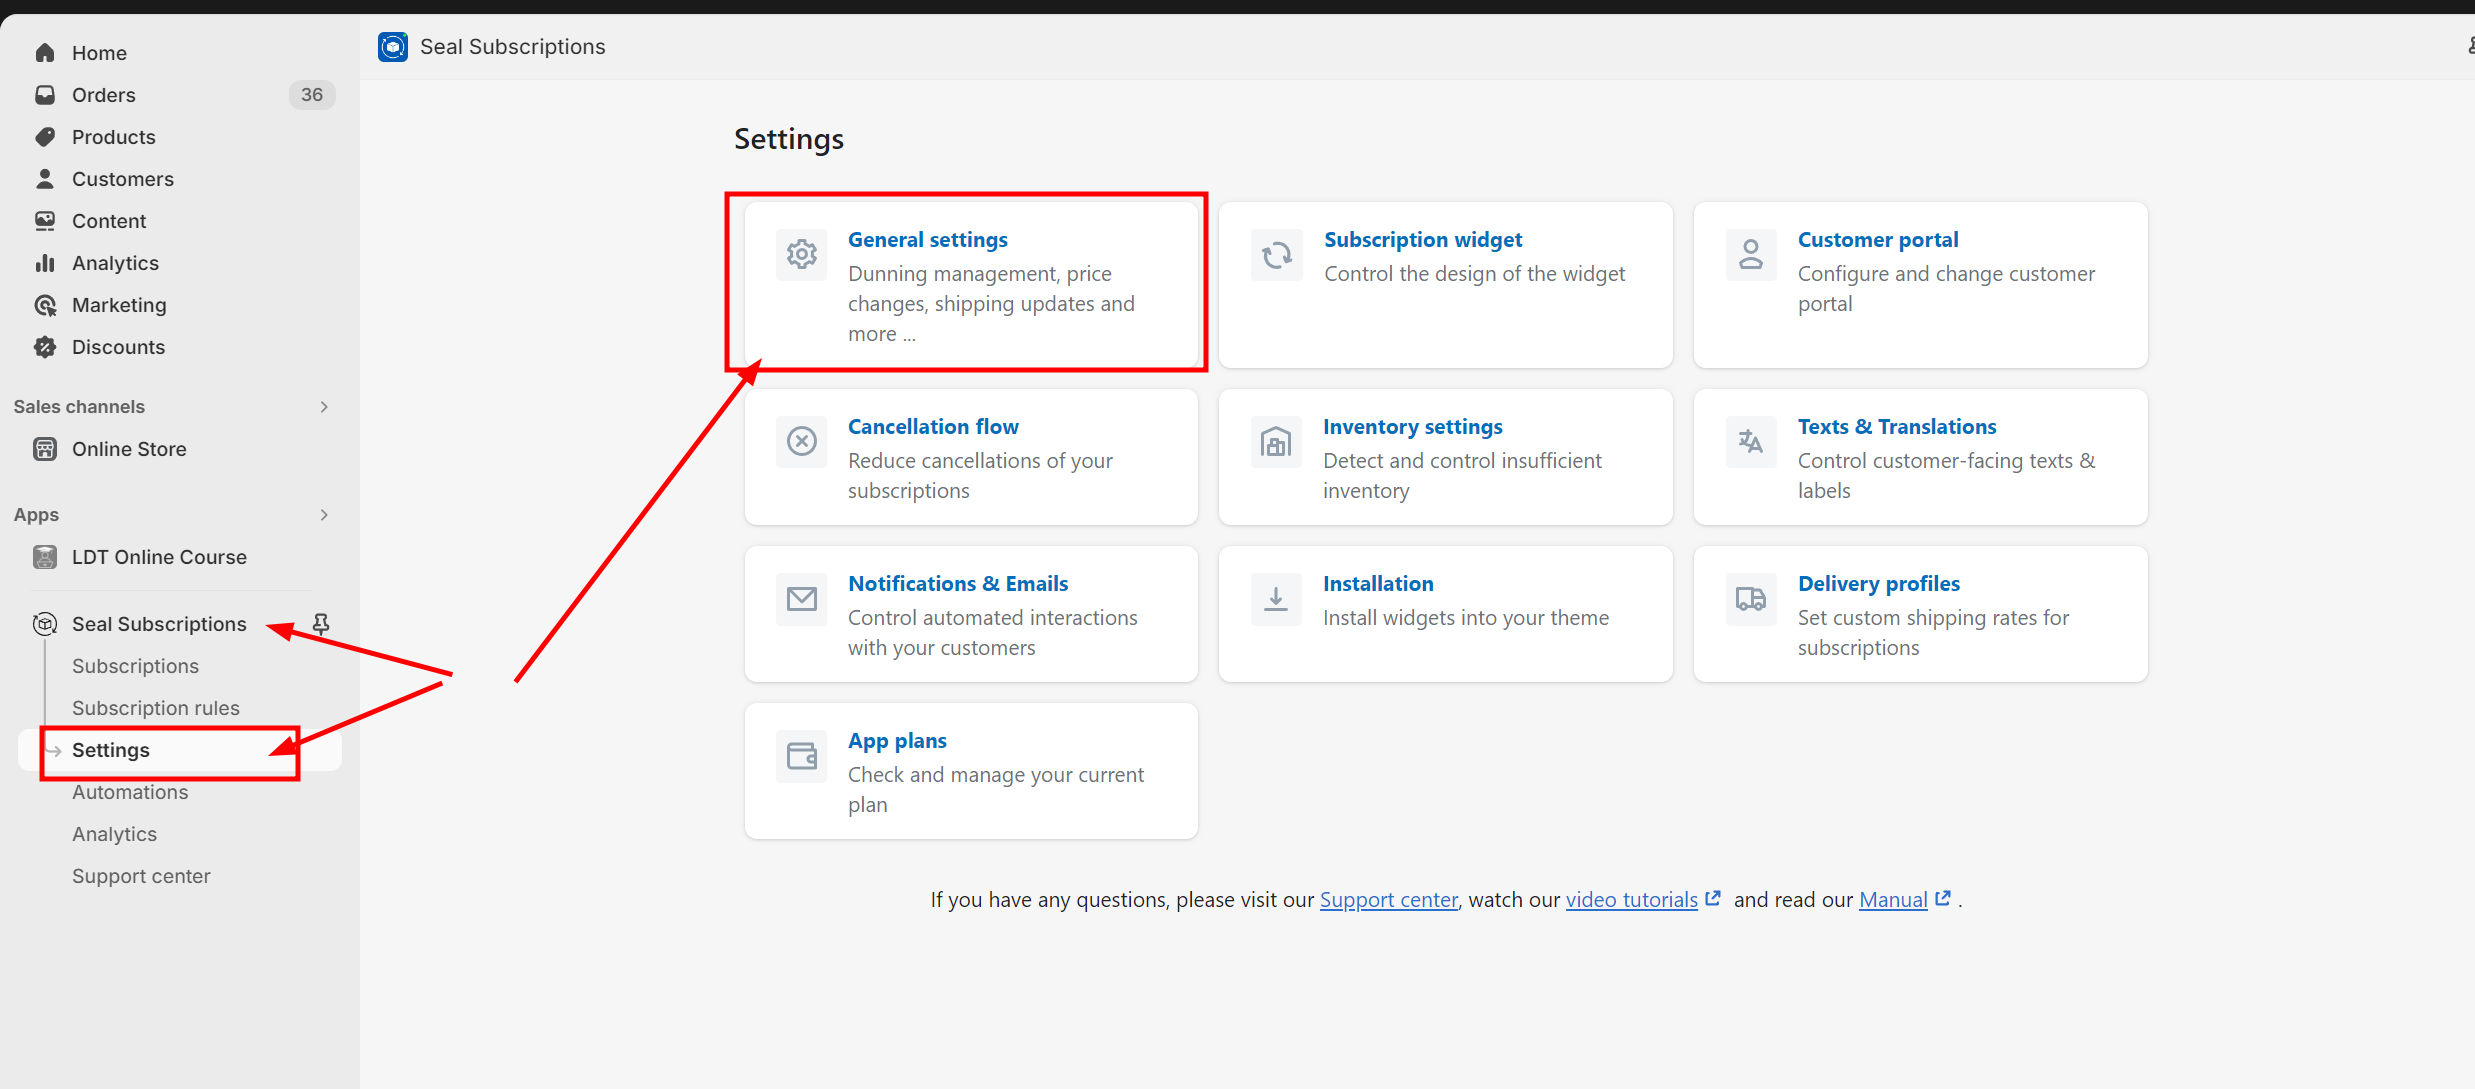
\- From your Shopify admin -> Seal Subscription -> Settings -> General settings
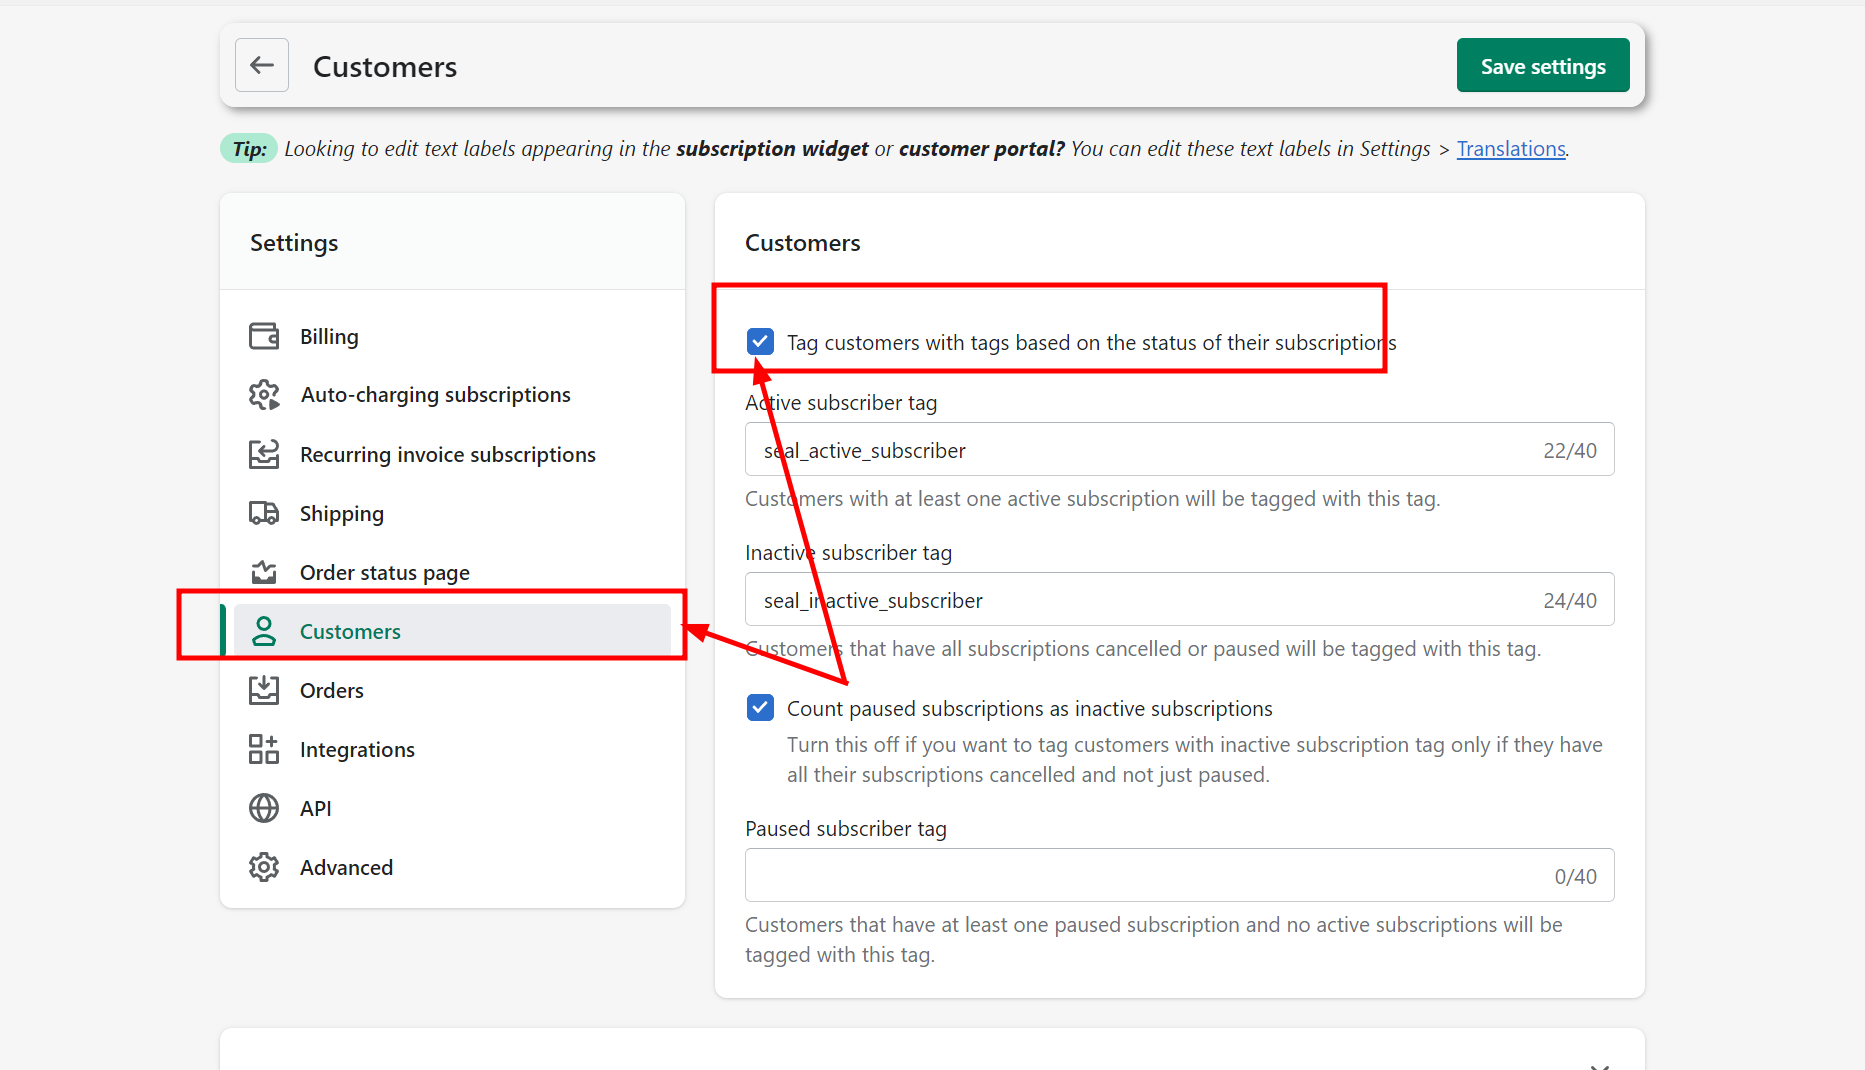
\- Select Customers tab -> Active **Tag customers with tags based on the status of their subscriptions** option -> Save your changes
#### 3. Add Active Tag to your course setting
* Basically, our App will enroll your customer to course automatically if your customer have tag **seal\_active\_subscriber**
* You can custom the tag to different value if you want
### Result
The course sells as a subscription: the buyer pays through the subscription app, and the app enrolls them with timed access or through the active tag, depending on the method you chose.
### Troubleshooting
* **The subscription option is missing at checkout.** The product must have the subscription plan from the app, and the plan must point at the right variant.
* **The buyer is enrolled but access never expires.** Set **Limit time access** for the variant, or use the tag method with a course expiry.
* **The tag method enrolls nobody.** Check that the tag name matches exactly and the course's tag enrollment is enabled.
* **Both methods conflict.** Pick one; using timed access and tags together can enroll the same customer twice with different expiry rules.
### Related pages
* [A Step-by-Step Guide to Setting Up an Automated Subscription Course](https://helpdesk.ldtsoft.work/ldt-online-course/enroll-and-price/a-step-by-step-guide-to-setting-up-an-automated-subscription-course.md)
* [Setting Up a Subscription Course with Enrollment Tags](https://helpdesk.ldtsoft.work/ldt-online-course/enroll-and-price/setting-up-a-subscription-course-with-enrollment-tags.md)
* [How to sell a course as a group license](https://helpdesk.ldtsoft.work/ldt-online-course/enroll-and-price/how-to-sell-a-course-as-a-group-license.md)